Wednesday, June 5, 2013

The Deconstructed Banoffee

Beautiful granita and pistachio truffles, toffee coated banana, piped with strawberry jam, served on sticky caramel with fresh strawberries and a web of toffee.


If you have ever had banoffee before you’ll know that this is the luxury crack of desserts. I cannot get enough and the best part is, homemade banoffee is always almost better than restaurant quality. She is very much a daughter of her mother, mother being England; rich, comforting and decadent. Desserts are a part of everyone’s lives and we all hold nostalgia for them.
The idea of the deconstructed banoffee is to give a different take on the texture, taste and tactile sense. To play on the nostalgia of ‘desserts and treats’; truffles, licking the bowl, jam filled pastries, toffee – the list could go on! These sensory memories paired with a banoffee should make for an interesting eat at a dinner party.

I’ve broken up the ingredients of the dessert to explore and experience taste through nostalgia. Sweet and savory sensory bombardments in this banoffee are a tasting platter marrying childhood to adulthood. I have listed an approximate amount of ingredients that makes for about four to six plates. The toffee cage was purely experimental after watching a Youtube video and playing around with measurements and methods. Have fun, try it out, it’s so much easier than I had imagined.


Ingredients
Serves four to six

120g granita biscuits
70g butter
395ml sweetened condensed milk
4 bananas
1 cup thickened cream
1/3 cup brown sugar
100g shelled pistachios
½ punnet of strawberries
100ml water
250g of white caster sugar
1 tsp honey
3 tbsp good strawberry jam

Directions
Make the caramel first to sit and solidify. Start by heating the condensed in a saucepan, once hot add 50g butter and brown sugar and stir constantly for 15 minutes, removing lumps. Do this with a wooden spoon. Set aside and leave to thicken.

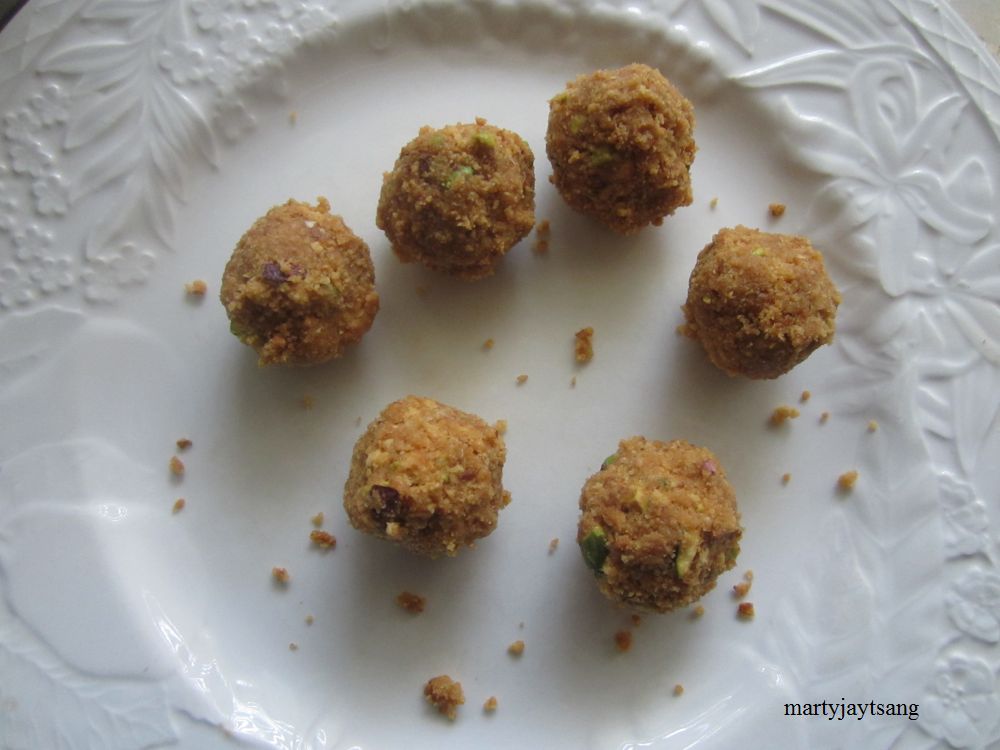
For the biscuit base truffles, start by pounding the granita biscuits and 85 grams of the pistachios into crumbly pieces. Heat remaining butter and add through the mixture until full absorbed. With your hands, roll small balls until they resemble round truffles. Set in fridge to cool.

The next major component is the toffee cage. Start by bringing water to boil then add sugar and honey and cook, stirring regularly for 15 minutes, or until liquid has reduced into a thick golden syrup. Add a small nob of butter to help the toffee bind better. Let cool for 5 minutes and then with a spoon drizzle the thick toffee over the back of a soup ladle for a rounded shape. Be sure to keep the spoon high while you drizzle to keep the toffee consistent and thin. Coat the back of the ladle, painting a spider web. Once it has formed a thick web, lightly turn then with fingers and it should come off nicely. While it is still pliable, mould into a cage by rounding the web with your hands. Make a few, as needed and place in the fridge to harden. Hold onto the remaining toffee. If the remaining toffee hardens, simply reheat.

The next element is the banana piped with strawberry jam. Start by slicing the bananas on an angle, by cutting each into 3 large pieces, discarding the ends. Slice on an angle for shape. Using a straw, pipe a hole through the centre, large enough to fill with jam. With a piping bag or a as I did, a plastic freezer bag, pipe jam into the banana. The last thing left to do is seal by rolling in the reheated remaining toffee. This will seal and stop the banana from oxidising too fast. You can try covering lightly in cling film until plated. Whip cream with a little icing sugar.


The last step is to plate. Start with a big lick of caramel and then add ingredients around the centre. Halve the strawberries too. Finish by placing the cage over the top – the last step is purely creative and your work of art. Serve cream in a small dish on the side, and sprinkle remaining crushed pistachios over the plate. 

Saturday, June 1, 2013

Steamed Black Bean Pork

I’ve been eating this dish for as long as I can remember. Steamed black bean pork is a Cantonese staple served in the home and also at some restaurants, mostly yum cha. It takes many subtle flavours to empower pork ribs and a distinct black bean. There are two substitutes for pork; the first is chicken, using wings or breast and the second is tofu, as a vegan option. I like tofu puffs, bought at Asian grocer. Also always ask the butcher for female pig, the male has a pungent, dirty smell. It costs no extra for you or the butcher!


Chinese black beans are readily available in sealed packages at any Asian grocer, always! My favourite thing about Chinatown other than eating was trawling through Asian grocers, #gaysianatheart

There is nothing more to this dish than good marinating and intuition, and it’s easy done. My parents never use measurements for this recipe and I do the same, but for the purpose of this post, I’ve given my personal approximations. I like robust, salty and tender goodness. Always look at what you’re cooking with and cook with feeling, altering the measurements to your taste.

Ingredients
Serves four
250g  pork spare ribs
2 tbsp black beans
¼ cup soy sauce
½ tsp sesame oil
1 tsp vegetable oil
2 shallot/scallions diced
2 cloves of garlic, crushed
1 tbsp corn flour
1 tbsp white sugar
½ tsp salt

Directions
Start by placing the semi hydrated black beans in warm water for five to ten minutes. Combine all ingredients except the corn flour with pork and massage the meat. The sugar will tenderise the meat and remove the slightly bitter edge of the black beans with a subtle sweetness. The last ingredient to add is the corn flour; this will thicken the remaining sauces and coat the pork.


Leave the pork to rest and marinate, allowing the flavours to meld – this is key!! Once marinated steam for 30 to 40 minutes or until tender and cooked through. Thick, dark green Chinese vegetables are always really nice to pair with this dish. They are really clean, but intense with natural flavour. 

Wednesday, May 29, 2013

Hey Pesto!

Developed and mastered over many years in Northern Italy, pesto has very humble beginnings and today it’s an unknown super food snack eaten everywhere. I did some digging into what made pesto, pesto and what it was that made it so healthy. The primary ingredient basil is an antioxidant and is used to treat stress the Eastern world. Olive oil is a good fat, known to reduce cholesterol levels in the blood and for skincare, all over the world. Pine nuts contain vitamins A, C and D and fight free radicals in the body, preventing long term illness. They are also high in protein and magnesium. Garlic is known for reducing blood pressure and protecting the heart. The health benefits of these ingredients are endless, and make pesto that much better!
I have done a basic pesto blend here, but tastes and diets are always so varied, so I have included a table with some popular alternatives. All alternatives have been taken from historical and modern dietary recipes. You can use pesto with pasta, meats and salads – whatever you need really.
Sauces and dips are best made with pure intuition, so use the recipe as a guide, so taste, smell and touch; it’s really all about what flavors you enjoy more. Pesto can be stored in air tight jars, sealed with olive oil. The shelf life is generally one to two weeks, refrigerated. Alternatively you can freeze pesto!
Ingredients
Serves four
2 bunches basil
2 cloves of garlic
¼ cup pine nuts
¼ cup walnuts
½ cup parmesan cheese
½ cup extra virgin olive oil
2 tbsp lemon juice
Salt and pepper to taste

Directions
There are secrets to ignite huge flavors in a pesto. The first is to start by blanching your basil leaves in salted water. Do so by pouring boiling water through basil in a colander, then shocking into ice cold water. This helps the basil retain its freshness. You can use either a pulse blender or a mortar pestle. Start by pulsing your basil, follow by adding half the olive oil. The second secret to a great pesto is to toast your nuts slightly, to bring out the warmth and depth in flavour. Add to the blender with garlic and cheese and pulse again. Finish by stirring through lemon, salt and pepper to taste. You may need to add the remaining olive oil. Be sure to use good olive oil for taste.

Tuesday, May 28, 2013

Quinoa; The Paradox of the Luxury Superfood

Quinoa is another super food that is really in vogue again and for good reason; it’s a once forgotten grain that is a perfect substitute for so many foods with less or little nutritional value. It is extremely high in protein, fibre, phosphorus, magnesium, iron and calcium. The cultivation of quinoa dates back 3000 years ago, serving as a staple during pre-Colombian Andean civilization. The grain fetches 10 times the dollar amount of wheat, as a minimum and so has been labelled a ‘luxury vegetable’ by some trade economists.
Quinoa can be very particular about its requirement’s for growth and where it does, it serves as food to the local population. With prices inflating, locals in subsistence farming areas are unable to touch their own produce, causing debate about whether or not quinoa is really worth its weight in gold. Instead of using this nutritious super food to feed the first world at a huge price, it could be better used to feed third world nations. What we can do to ensure our global neighbors do not go hungry is to only buy quinoa that has been Fair Trade approved. So that’s what I did, I made a beautiful quinoa salad combining my beloved haloumi cheese and a lemon/olive oil dressing. 

Ingredients
Serves two
½ cup quinoa
1 cup spinach
50g  haloumi cheese
¼ small cucumber
¼ small red onion
½ cup of walnuts and pine nuts
½ lemon
¼ cup olive oil
Salt and pepper to taste

Directions
Cook your quinoa as directed on packaging. Usually this is one part quinoa to three parts water. Thinly slice your cucumber and red onion and set aside. Slice haloumi as desired and pan fry on both sides for three minutes total on high heat. Combine olive oil with juiced lemon and salt and pepper to taste.


As the quinoa is finished, set aside to allow for cooling. In a high heat pan, toast the mixed nuts to release the warm woodiness. Combine and toss all ingredients in a bowl and cover with dressing. The salad can be served warm or cold, depending on the occasion and what you like. 

Monday, May 20, 2013

Tropical Kebabs


I’ve always had a soft spot for charred meat and BBQ, who doesn’t! Two of my favorite things to BBQ are kebabs and char siu ribs. I grew up with a huge brick barbecue that cooked everything with the most amazing texture and taste. Everything had a rich, woody and smoky flavor  that you will never find on a Weber cooker. A crispy charred crust and a soft, tender meat on the inside will leave you salivating for more. Using your hands for barbecue is of mixed opinion. I am of the belief that different foods are best enjoyed by engaging all of your senses. You use your vision, your taste and by using your hands you enjoy the food that much more, and let’s face it, some foods were not meant to be eaten neatly; you have to get sticky and dirty. 


For this simple recipe, I’ve combined a few of my favorite ingredients and cooked them on a griddle over a gas cooker, being short a BBQ. Pineapple goes really well with many meats and it’s a fresh offset when you are barbecuing heavier meats. I’ve used lime and pepper to marinate the beef too, using acidic fruits like lemon, lime and grapefruit really help tenderize meats, especially when you’re using cheaper cuts of beef for a big barbecue or kebabs.


Ingredients
Serves two – three
500 grams diced beef cubes
1 small red onion
4 thick slices of pineapple
1 small capsicum/red pepper
½ chorizo sausage
1 lime
Salt and pepper to taste

Directions
Start by soaking your skewers in water at least an hour before cooking to avoid burning. Marinate beef cubes with lime and pepper and set aside. Follow by slicing all remaining ingredients. On a medium to high heat, brown beef and also lightly cook chorizo. By precooking the heavier meats, everything else will cook at an even pace.On a griddle, cook the skewers for 6 – 8 minutes, rotating every two minutes for an even char. Serve with a side salad, or other BBQ accompaniments. 

Wednesday, May 1, 2013

Spring Lamb


For the first time in at least a year, I finally decided to cook with lamb. It’s not as available as it is in Australia. Here, the heavy weights are beef, pork and chicken. It’s really starting to warm up now, but with the crispness of spring still in the air. I did a cast iron mini roast that’s mostly Mediterranean inspired. 


Ingredients
Serves two

2 lamb chops
1 tsp cumin
3 sprigs thyme
2 large potatoes
1 roma tomato
4 garlic cloves, with skin
4 tbsp olive oil
Salt and pepper to taste

Directions
Start by marinating the lamb, combining olive oil, cumin and thyme. Avoid salt at this point because we do not want to draw out the juices before browning and cooking lamb. Chop potatoes into four pieces then boil until tender. In a cast iron pan, sear the marinated lamb on both sides, browning well – do so for two or three minutes both sides. Slice tomato into four pieces and add to cast iron pan with potatoes and garlic mixing well to coat in remaining juices. Replace the thyme also into the pan.

Bake in preheated oven  of 375 for 12 – 15 minutes, turning vegetables once. Serve in cast iron pan. 


Wednesday, April 24, 2013

Never too Late for Anzac Biscuits


In belated honor of our ANZACS. This year ANZAC day had completely crept up on me but low and behold I was brought up to speed by FB. This recipe isn’t completely mine, it’s mostly by Donna Hay, because my sweet tooth cooking is still a work in progress – to an extent.
The biggest difference here is that instead of using plain rolled oats, I toasted mine lightly in honey and a pinch of cinnamon, for something different. Also, mine didn't fall as well as I had hoped (mostly due to impatience in preparation) so they take a macaroon meets biscuit status.

Ingredients
Serves two


1 cup rolled oats
1 cup plain (all-purpose) flour
⅓ cup caster (superfine) sugar
¾ cup desiccated coconut
3 tbsp honey
2 tbsp golden syrup
125g butter
1 tsp bicarbonate of (baking) soda
2 tsp hot water

Directions
Start by tossing the rolled oats in 3 tablespoons of good honey.  Bake in oven for 5 minutes on high heat. Let cool while you start the recipe as usual.
Preheat oven to 160°C (320ºF). Mix the oats, flour, sugar and coconut in a bowl. Place the golden syrup and butter in a saucepan over low heat and melt. Mix the bicarbonate of soda with the water and add to the butter mixture. Add to the dry ingredients and mix well. Place tablespoons of the mixture, leaving space between each one for spreading, onto baking trays lined with non-stick baking paper and flatten to about 7cm in diameter. Bake for 8–10 minutes or until a deep brown. Cool on trays for 5 minutes, then transfer to wire racks to cool completely. 

Grilled Corn Mexican Style


 One of my favorite restaurants in NYC is the cool Café Habana, where the waitresses’ sass matches the food. The café was inspired by the original, still operating in Mexico. In the heart of Soho, this small gem is an experience as much as it is a destination. It’s tiny and there’s always a wait, but it’s all completely worth it in the end. When friends come to visit, it’s a must on the to-go list. My two picks on the menu are the Cuban sandwich (with rice and beans) and the grilled corn. Café Habana was actually voted to have the best Cuban sandwich in NYC – IT’S TRUE. There is a Hispanic cheese that is used for the dish traditionally, however for the purpose of accessibility I’m keeping the cheese option wide open.  

 Hot sauce is amazing with this dish too, really, really amazing. The original recipe uses lime too. But this is optional
 

Ingredients
Serves two

2 corn in husk
3 tbsp butter
3 tbsp mayonnaise
½ cup cheese
Salt and cayenne pepper to taste

Directions
Bring water to boil and add butter and salt. Shortly after, add corn and cook for seven minutes. Once cooked, let corn stand to dry then grill all sides until corn starts to blacken to your liking. Follow by pasting mayonnaise onto the corn, coating liberally. Coat corn in cheese of choice then broil/grill until cheese is well melted. Dash with cayenne and salt to taste. 

Tuesday, April 23, 2013

Rice Congee: Nourishment from the Motherland

Chinese Congee, aka, ‘jook’ is an Asian cure-all rice soup. Many countries in the Asian region have a history of the soup with many ingredient variations. From China, it was thought to be served during times of famine. For me it’s a nostalgic, penny pinching breakfast, lunch and dinner that I LOVE. My dad always used to make this soup as I was growing up, especially when I was sick. Nostalgic food has a really funny way of comforting you when you need it to. 


The idea is to cook the rice in a heavy weight of water or stock until it breaks up and forms a porridge-like consistency. Jook is served with a deep fried bread stick in many places too. I went to Chinatown yesterday and found a store that sold fresh bread sticks, so I made a huge batch today. 


Ingredients
Serves four
9 cups chicken stock
1.5 cups white jasmine rice
2 scallions/shallots
2 cloves garlic
1 tbsp ginger
1 tsp sesame oil
Salt and white pepper to taste
Soy sauce to taste

Directions
Dice garlic, ginger and scallions (leaving ½ scallion for garnish). In a saucepan, quickly heat ingredients in sesame oil and follow with stock (brings out the flavors in hot oil). Wash rice before adding to stock to remove all starch. Once everything has been combined, heat to the boil then reduce and let simmer for two hours. The rice should start to break apart and a thick consistency will start to form. 

The beauty of this soup is that you can add whatever you want, depending on your taste; chicken, duck, century eggs, fish, vegetables or tofu. Depending on what you make the soup with, it can be well nourishing.


Wednesday, April 17, 2013

Dove Elevating Women, Beauty and Confidence


Today, more than ever, we are taught too quickly by brands what we are lacking before we even know it or given a gentle affirmation of what we may have already suspected. Dove has been a pace setter, working to use its brand and loyal following to correct a mass ill-alignment of personal perception held by women worldwide.

Dove’s latest beauty campaign, quite literally examines the personal and external perception of oneself. The short video campaign uses blind sketching by former FBI trained forensic artist, Gil Zamora to provide two views of one woman and to promote an understanding of true beauty.
The women were asked to describe themselves while being sketched blindly, all describing themselves in a lesser light; thinner lips, bigger noses and wider foreheads, all common soft spots and targets for marketers everywhere.  Zamora then recreated seven profiles based on descriptions provided by strangers who had met with the women earlier. The sketches were more accurate and complimentary. The women were then shown both sketches. This beauty study saw women understand the gap between personal and external perception.

‘It impacts the friends we make, the jobs we apply for, how we treat our children – it impacts everything. It couldn’t be more critical to our happiness.'

Dove has been famed in recent years for its advertising and marketing which has always looked to engage and invite women to embrace natural beauty, not to create or remove it. The world of beauty is no longer beautiful as much as it is judgmental and we have all fallen victim to convincing marketing ploys. By gaining the respect and loyalty of women, Dove enhances its brand by affirming that their family and its products are not for body (or confidence) improvements, but for sustainability and celebration of inherent beauty.

The video has since gone viral, tapping on the shoulders of women (and men) everywhere and sending out a positive affirmation. Dove conducted this experiment to ‘prove something very important: You are more beautiful than you think.’